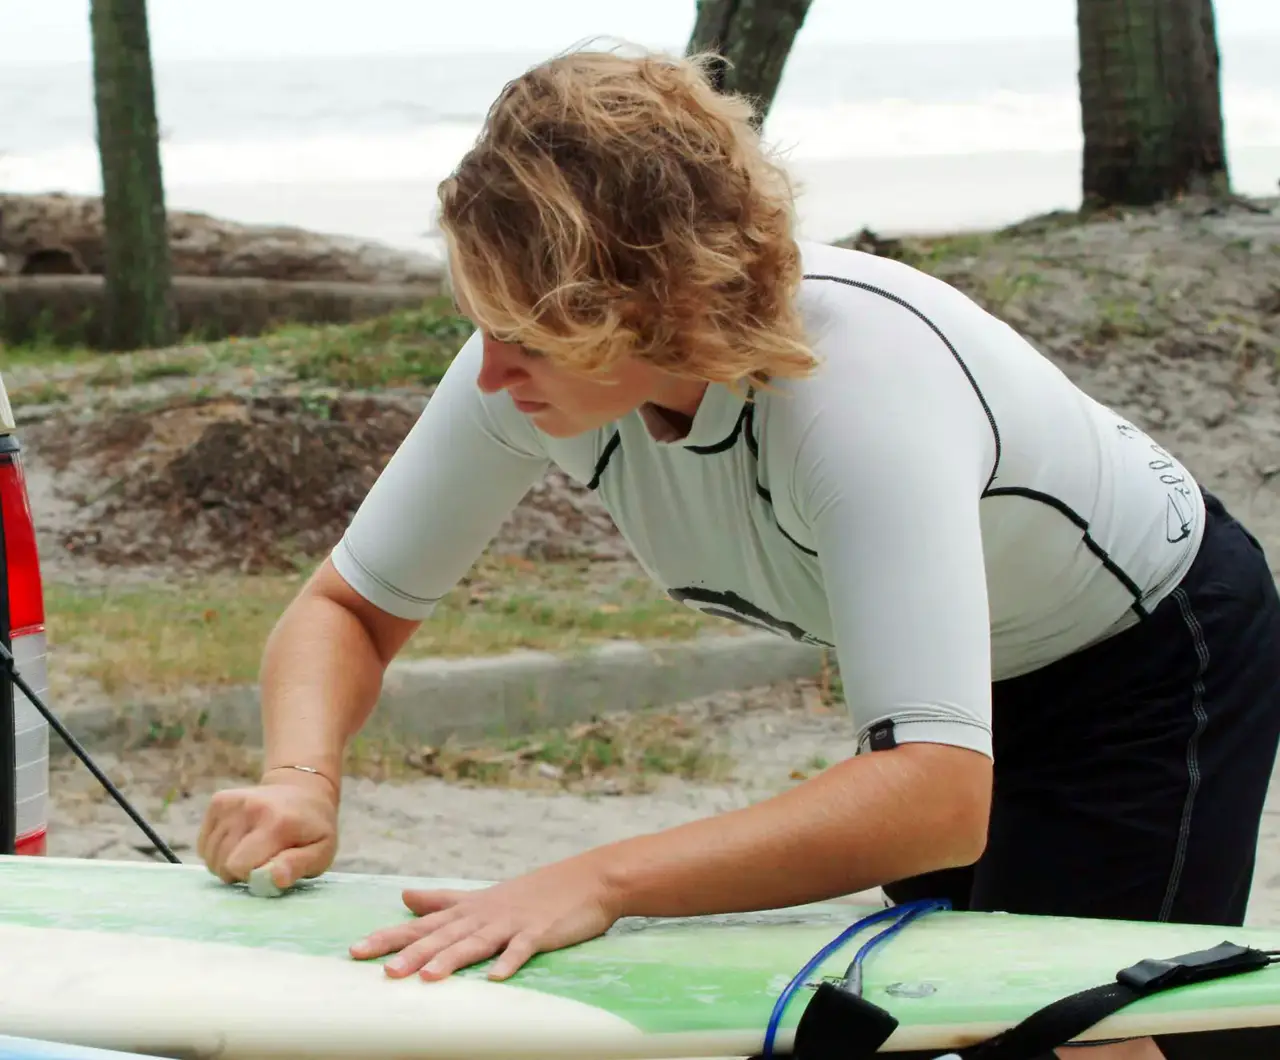
How to Remove Wax from Your Surfboard Effectively
Wondering how to remove wax from your surfboard? This comprehensive guide breaks down the best methods for wax removal, ensuring your board is clean and ready for its next session or application. Learn expert tips to revitalize your ride.
Surfboard Life · February 2, 2026 · 13 min read
To effectively remove wax from a surfboard, start by gently warming it for 5-15 minutes in the sun (or using a hairdryer on low) to soften the wax. Then, use a plastic wax comb to scrape off the majority. Follow this with a specialized wax remover solution or mineral spirits for stubborn residue, and a clean cloth for a sparkling, ready-to-rewax finish.
Learning how to properly remove wax from your surfboard is more than just a chore; it's a vital part of surfboard maintenance. Whether you're refreshing your deck for a new coat, preparing for a repair at our Repair Center, or simply giving your board a much-needed deep clean, proper wax removal is essential. A clean board not only looks better but also allows for better assessment of its condition, identifies pressure dings and delaminations, and ensures that new wax adheres optimally for maximum grip. As experienced shapers often note, "A clean canvas is the best starting point for any art, and your surfboard is no exception."
Neglecting regular wax removal can lead to several problems. Old, caked-on wax can trap sand, dirt, and microplastics, creating an abrasive surface that can cause rashes, obscure minor damage, and even subtly alter your board's hydrodynamic properties. It also becomes less effective, offering diminished traction even with fresh layers applied over it, leading to a loss of feel and connection with your board. This comprehensive guide will walk you through the various methods to remove wax safely and efficiently, incorporating the latest techniques and product developments from 2025-2026 to ensure your board remains in prime condition for countless waves.
Why and When You Need to Remove Surfboard Wax
Understanding the 'why' behind wax removal is just as important as knowing the 'how.' Surfboard wax, while crucial for traction, degrades over time. It collects dirt, sand, sunscreen, microplastics, and even bacteria from the ocean. This accumulation not only makes the wax less effective but can also contribute to a grimy, unappealing aesthetic that obscures the beautiful lines and finishes of your board. Pro surfers and dedicated enthusiasts often strip their boards clean every 1-3 months, or sooner if they notice significant build-up, especially around key traction areas on the board's Surfboard Anatomy.
There are several key scenarios where you'll want to remove wax completely:
- Applying Fresh Wax: For optimal grip, applying new wax to a meticulously clean deck is always best. Layering new wax over old, worn-out wax creates an inconsistent, often lumpy surface that provides poor, unreliable traction and can even contribute to foot slipping.
- Seasonal or Water Temperature Wax Changes: Different water temperatures require different wax formulations (cold, cool, warm, tropical). When transitioning between seasons or surf destinations, a full wax removal is necessary to ensure you're using the correct wax hardness and prevent mixing incompatible wax types. Modern wax formulations are increasingly specialized and optimized for specific temperatures, making proper transitions even more critical for peak performance.
- Inspecting for Damage: A clean board makes it much easier to spot dings, cracks, pressure dents, or delaminations that might require immediate attention. This is particularly important before a big surf trip or after a demanding session. Catching small issues early can prevent more extensive and costly repairs later on. Our Repair Center emphasizes the importance of a clean inspection.
- Selling or Storing Your Board: If you're selling your board, a clean deck significantly increases its appeal and perceived value. For long-term storage, removing wax prevents it from melting, hardening into an unmanageable mess, and potentially creating pressure points, especially in hot environments.
- Board Maintenance and Aesthetics: Simply put, a clean board looks and feels better. It's a matter of respect for your equipment and enhances the overall surfing experience.
The Warming Method: Your First Step to Easy Wax Removal
One of the simplest, most effective, and eco-friendly ways to start your wax removal process is by gently warming the wax. This method makes the wax soft and pliable, which significantly reduces the effort required to scrape it off cleanly. This technique is universally recommended by experienced shapers and board repair specialists due to its gentleness on the board's finish and structure.
How to: remove wax using the warming method:
-
Harnessing the Sun:
- Placement: Find a sunny spot, ideally where there's little wind to prevent sand from sticking to the softening wax. Lay your surfboard deck-side up on a soft, protective surface like grass or a towel. Avoid asphalt or concrete as these surfaces absorb excessive heat and can lead to uneven heating or overheating.
- Timing: Depending on the ambient temperature and the intensity of the sun, leave the board out for 5 to 15 minutes. In very hot climates (e.g., tropical sun), 5 minutes might be ample. In cooler but sunny conditions, it might take a bit longer. The goal is for the wax to become soft and slightly gooey (like warm chewing gum), but not melted into a liquid puddle.
- Observation: Keep a close eye on your board. You don't want to leave it in the blazing sun for too long, as excessive localized heat can potentially damage the epoxy or polyester resin, leading to delamination, bubbling, or discoloration, particularly with darker boards, specific resin tints, or advanced carbon constructions. Overheating can also weaken fin plugs (see our Fin Systems Guide) and potentially void warranties for certain board constructions. Always touch the board periodically to gauge its temperature. If it feels hot to the touch, move it to the shade.
-
Indoor/Cloudy Day Alternative (Hairdryer or Heat Gun):
- Method: If the sun isn't available or you're working indoors, you can achieve a similar warming effect using a hairdryer on a low-to-medium heat setting. (A modern cordless heat gun with precise temperature control and a wider nozzle is also an excellent option for experienced users, but always use the lowest setting and maintain a safe distance).
- Application: Hold the heat source about 6-10 inches from the board, moving it continuously in small, overlapping circles. Avoid concentrating heat in one spot for too long, as this is a common cause of localized heat damage. Focus on a small section of wax at a time, just enough to soften it before scraping. This method is particularly useful for targeting small, stubborn patches or for delicate areas near fin boxes or leash plugs, allowing for controlled heat application.
-
Immediate Scraping: Once the wax is soft and pliable (regardless of the warming method), immediately move the board to a shaded area (if using sun) to prevent re-hardening, and begin scraping. Use a plastic wax comb (metal combs can scratch your board!) and follow the detailed scraping techniques outlined in a later section.
Pro Tip: For extra stubborn, very thick, or exceptionally old wax layers, applying a thin layer of specialized wax remover before warming can sometimes help penetrate and loosen the wax, making the entire process even more efficient. However, always prioritize gentle warming as the primary first step to avoid unnecessary chemical usage.
Chemical Solutions: For a Pristine, Residue-Free Finish
Even after thorough scraping, you'll almost certainly be left with some faint wax residue, a greasy film, or tiny, stubborn bits ingrained in the board's texture. This is where chemical solutions come into play to clean surfboard surfaces and achieve a truly pristine, ready-for-rewaxing finish. Several options are available, ranging from specialized wax removers to common household items, with new innovations surfacing in 2025-2026.
Specialized Surfboard Wax Removers:
These products are specifically formulated to dissolve wax without damaging surfboard materials. Many leading brands are now focusing on bio-based, plant-derived, and solvent-free formulas, moving beyond traditional citrus-based solvents for even greater eco-friendliness, reduced volatile organic compounds (VOCs), and skin safety.
- How to Use: Apply a small amount to a clean, soft cloth (microfiber works great). Wipe down the waxed areas in circular or linear motions. The residue will dissolve and transfer to the cloth. You might need several clean cloths as they become saturated with wax. Work in small sections to control the process.
- Pros: Highly effective, generally safe for all surfboard constructions (epoxy, polyester, PU, carbon fiber), often pleasantly scented, and significantly less toxic than industrial solvents. Latest 2025-2026 formulations are increasingly emphasizing biodegradability, marine-safe ingredients, and non-flammable properties, making them safer for home use and the environment.
- Cons: Can be more expensive than household alternatives.
Mineral Spirits / White Spirit:
Mineral spirits (often labeled as white spirit in some regions) are a common, inexpensive petroleum-based solvent that effectively dissolves wax and grease.
- How to Use: Dab a small amount onto a clean cloth. Wipe the board thoroughly, focusing on areas with significant residue. The wax will liquefy and lift off.
- Pros: Highly effective, readily available, and inexpensive.
- Cons: Strong odor, more aggressive, and less environmentally friendly. Can be drying or irritating to skin. Always ensure good ventilation when using mineral spirits. Always test a small, inconspicuous area first, especially on older, painted, or custom-finished boards, to ensure it doesn't affect the board's finish or graphics. Avoid prolonged contact.
Rubbing Alcohol (Isopropyl Alcohol):
While not as powerful as high-strength solvents, rubbing alcohol (typically 70% or 91% Isopropyl Alcohol) can help dissolve thin wax residue and clean surfaces effectively, particularly after initial scraping.
- How to Use: Apply with a cloth and rub vigorously. It's best for lighter films or as a final degreasing step rather than for heavy residue.
- Pros: Evaporates quickly, less harsh odor than mineral spirits, and acts as a disinfectant.
- Cons: Less effective on heavy wax, can be drying to some surfaces with prolonged exposure, particularly older resin tints.
Other Alternatives and Emerging Trends (2025-2026):
- Coconut Oil/Baby Oil: Still surprisingly effective for dissolving many types of wax, especially eco-friendly or softer waxes, often leaving a pleasant scent. Apply a small amount, let it sit for a few minutes to penetrate, then wipe off with a clean cloth. It's gentle but can leave a slight oily residue itself, which may require a final wipe with rubbing alcohol or a mild, eco-friendly dish soap solution.
- Vinegar (White Vinegar): A natural and very mild option. While less powerful for dissolving heavy wax, it can be effective on very light residue, hard water spots, or as a final wipe-down for a squeaky-clean finish. Mix with water (50/50).
- Enzyme-Based Cleaners: New formulations are gaining traction in 2025-2026 that utilize bio-enzymes to break down organic materials like wax. These are often ultra-eco-friendly, non-toxic, and biodegradable, offering a gentler yet effective cleaning solution, though they may require longer dwell times to be fully effective. They are particularly good for eliminating odors and bacterial residue.
- Abrasive-Free Microparticle Cleaners: Innovators are exploring highly refined, non-abrasive microparticle pastes (similar to gentle car polishes) that can lift and absorb wax residues, polishing the surface without harsh solvents. These are still developing but show promise for specialized finishes or when extreme gentleness is required.
Pro Tip: Always wear gloves and ensure good ventilation when working with any chemical solvents to protect your skin and respiratory system. After using any chemical solution, give your board a final wipe-down with a clean, damp cloth (water only, or a very mild eco-friendly soap solution) to remove any chemical residue, then dry it completely with a separate, clean cloth. This ensures the surface is perfectly clean, neutral, and ready for fresh wax or repairs.
Detailed Scraping Techniques for Optimal Wax Removal
Effective scraping is the backbone of successful wax removal. While warming the wax (sun or hairdryer) makes it pliable, your scraping technique determines how much effort you'll need for the final clean surfboard residue removal. Different parts of the board, like the deck, rails, and around the fins, require slightly different approaches for efficiency and safety.
Essential Tools for Scraping:
- Plastic Wax Comb: The absolute essential tool. Most modern wax combs feature a variety of edges: a straight edge for large flat areas, a curved edge for rails and rounded contours, and often a small fin key for convenience. Newer designs (2025-2026) may incorporate specialized corners or finer tips for more precise fin box cleaning, or even integrated non-scratch fibers for initial residue removal.
- Old Credit Card/Plastic Scraper (Thin Plastic Card): Excellent for precise work, getting into tight corners, or along the edges of traction pads where a comb might be too bulky. It offers better flexibility and control for intricate areas. Avoid using credit cards with raised numbers as they can scratch.
- Microfiber Towels/Terry Cloth: For scrubbing off finer residue once the bulk is gone and for the final wipe-down with a chemical solution.
Step-by-Step Scraping Process:
- Preparation (Warming is Key): As previously discussed, ensure the wax is adequately warmed and soft before you begin. Attempting to scrape cold, hard wax is inefficient and can potentially damage your board's finish or even cause stress fractures.
- Initial Bulk Removal (Large Deck Areas):
- Once warmed, position your plastic wax comb with its straight edge. Hold it at a low angle (around 30-45 degrees from the board's surface) to maximize surface contact. A lower angle is generally more effective for removing wax in broader strips.
- Apply moderate, even pressure. Scrape in long, continuous strokes, typically from the nose towards the tail, or from the middle outwards to the rails. The goal is to lift off as much wax as possible in large, clean strips or clumps. Avoid short, choppy scrapes, as this tends to leave more small, scattered pieces.
- Working the Rails and Edges:
- Use the curved edge of your wax comb, or the long edge of an old credit card, for the rails. Hold the board on its side or prop it up to access the rail cleanly and comfortably.
- Work along the curve, maintaining consistent pressure. The rails often accumulate a thick, textured layer of wax and can be a trickier area to clean effectively.
- Nose and Tail:
- These areas, particularly the nose, generally have less wax. Use the straight edge of your comb or an old credit card for more precise control.
- Be extra careful around the delicate edges and points of the board to prevent accidental damage.
- Around Fin Boxes and Leash Plugs:
- These are notorious wax traps. An old credit card or the fine tip/fin key part of your wax comb is perfect here. Scrape gently and meticulously around the edges of the fin boxes and the leash plug.
- Pro Tip (2025-2026): For a truly thorough clean and to reduce scraping risk to fin boxes, consider removing your fins temporarily. This allows unfettered access to the fin box area and helps verify the integrity of the fin system itself. Our Fin Systems Guide provides instructions for safely removing and re-installing various fin types.
- Removing Residual Bumps and Texture:
- After the main bulk is off, you'll likely have a surface covered in tiny wax pebbles and a residual textured layer. Use the textured side (often jagged or grooved) of your wax comb. Lightly rub this textured edge over the entire deck. This helps to dislodge smaller, embedded pieces and rough up the remaining thin film, preparing the board for easier chemical removal.
- Initial Wipe-Down:
- Take an old terry cloth towel or a clean, tough rag and lightly rub the entire board. This friction can pick up a surprising amount of fine wax dust and small particles, preventing them from contaminating your chemical cleaning solution later.
Pro Tip: Always collect the scraped wax. Not only does it keep your workspace clean, but it's also better for the environment. Place newspaper or a designated container under your board. Some environmentally conscious surfers even melt down and repurpose old wax (though hygiene and performance are concerns for new applications), demonstrating a commitment to sustainability. Consider checking out World Surf League's environmental initiatives for more inspiration: www.worldsurfleague.com/environment.
Deep Clean and Inspection: Beyond Just Removing Wax
Once you've effectively scraped and chemically cleaned off all the wax, it's not just about a fresh surface; it’s a critical opportunity for a thorough inspection and ensuring your board's longevity and performance. This deep clean is crucial for proactive maintenance and optimal surfing. After all wax removal, your board's surface is fully exposed, allowing you to identify any hidden issues that might be obscured by wax.
Post-Wax Removal Inspection Checklist:
- Dings and Cracks: Carefully run your hands over the entire surface of the clean surfboard – deck, rails, nose, tail, and bottom. Look intently for any pressure dings (small indentations), hairline cracks in the fiberglass (especially along the stringer or rails), punctures, or chips. Even tiny, seemingly minor cracks can allow water to seep into the foam core, leading to delamination, waterlogging, or further structural damage. If you find any, either consult our Repair Center immediately for guidance on fixing them promptly or proceed with a DIY repair if you're experienced.
- Delaminations: Press